
Printing & gang sheets
Every code you make needs to end up on something physical. The print utility takes your QR codes and turns them into print-ready artwork — a single label for a home printer, or a full gang sheet of hundreds for a commercial run.
Opening the print tool
There are two ways in. From any item’s page, expand its QR card to download that one tag. To lay out many at once, open the print utility — creators get an extra creator mode that pulls in your generated codes.
Home printer or print shop?
Choosing a style
Each sticker style is a different shape and layout, shown as a small icon so you can see the proportions at a glance:
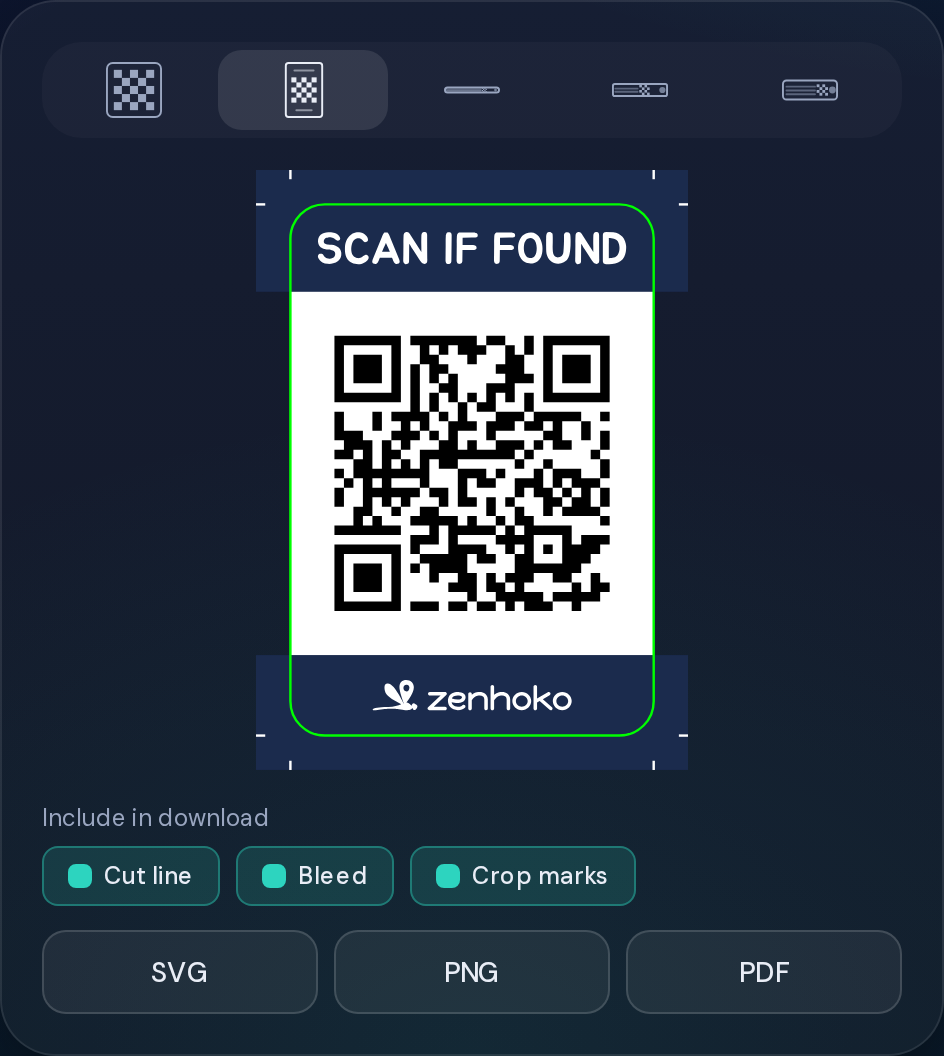
- • Standard — a tall tag with a “Scan if found” header and room for a logo. The everyday choice.
- • Narrow — a long, thin pill for wristbands, cable wraps, or the spine of a label.
- • Narrow Condensed — a compact version of the pill where space is tight.
- • Horizontal Write-In — a wide tag with a blank field to hand-write a name or note.
- • QR Only — just the code with a quiet-zone border, for when you supply your own surround.
Colors, cut lines & bleed
These controls make the difference between “looks fine on screen” and “prints correctly at a shop”:
Color: CMYK vs RGB
CMYK is the print-authoritative mode and the default — it’s what a press actually uses. RGB is there for screen previews. You can set the background, mark, and QR colors, use preset schemes, or force pure “max black”.
Cut lines & bleed
The cut line marks where the tag is trimmed; bleed is a little extra art past it so a slightly-off cut leaves no white edge. Defaults are 2 mm and match most die-cutters.
Print-ready cut lines
Single-tag downloads
Downloading one tag from an item’s QR card, you can toggle exactly what’s included before you export:
- • Cut line — the trim outline.
- • Bleed — turn it off and the tag is clipped to its rounded die-cut shape, nothing outside the cut.
- • Crop marks — registration ticks in the bleed (only available when bleed is on).
Turn them all off for a clean sticker on a home printer, or leave them on for a shop. Export as SVG, PNG, or PDF.
Gang sheets & Sheet IDs
A gang sheet tiles many tags onto one sheet so a printer runs them in a single pass. In creator mode you set the grid — columns, rows, spacing, margins — and the layout fills with your codes.
- 1
Lay out the grid
Pick a style and set columns, rows, and spacing. The preview shows the whole sheet, cut lines and all.
- 2
Turn on the Sheet ID
Enable Sheet ID to stamp each sheet with its own QR and identifier. When you download, the sheet is minted — recorded so you can track it and register the whole sheet later.
- 3
Download & print
Export the sheet as a print-ready PDF. Each sticker on it carries its own code, ready to be released and claimed individually.
Common questions
Where to next
Printed a sheet? The next step is releasing each code so buyers can claim it — that’s covered in Releasing items & claim keys.
Didn’t find what you needed? Browse the FAQ or contact support.